Thursday, January 29, 2015

Trying to Make Boots, Second Effort

It needs to be said that the class I took in no way taught us about boots.  I have absolutely no idea what I'm doing here. 
 
What I do know, is that I'm making an evening dress inspired by the armor of the Riders of Rohan, from the Lord of the Rings movies, sort of crossed with Elizabethan/Tudor.  And what that outfit needs, footwear-wise, is evening-dress appropriate riding boots. 
 
I've started boots before, but didn't get very far.  I taped, and made patterns, but I was having a really hard time figuring out what I wanted them to look like, and without a plan, everything kind of fell apart. 
 
So - starting out.  Again, not knowing the right way to measure the leg, I did the thing that made sense to me.  I wrapped my leg, from the knee down, in fabric, put my heel on a stack of coasters as tall as the heel would be, and taped over it with masking tape.  I marked my ankles, where my foot hit the floor (the feather line), the center back of my heel, and the spot I measure to for the high heel measurement.  Drew a line down the inside (where a zipper would go) and cut it off down that line. 
 
I taped that onto the last, taped up the last the rest of the way, and made a pattern.  Cut it out of fabric, and discovered that there was absolutely no way it would ever fit.  It was far too tight. 
 
Started over.  Did the exact same thing, but with one difference:  I wrapped the fabric over my jeans. A ways along in this project, it's clear that that's the way to go - when I try on the leather boot, it fits perfectly, with just the right amount of ease, around my bare or stocking-ed or yoga-pant-ed leg.
 
The design of the heel and vamp are inspired by a Jessica Simpson brand ankle boot, and a riding boot.   This photo shows the tape leg attached to the last, and the last taped, and the design lines marked out in tape and sharpie.
 
 
I have very large calves, so the boot leg is in four pieces - there just wasn't any other way.  Also, there's a shaping dart on the inside back piece, at the top, again to accommodate my freakishly large calves.  This is part of why I've never owned a pair of boots.  In making the pattern, I did quite a bit of adjusting to make the sides match.  I've never done a mean forme for shoes - I've read about it, and with my feet, it doesn't seem to be the way to go for the most part, but I wanted the vamp and counter to be *really* symmetrical.
 
I'm using the same 3-4 oz. tooling leather I used for the corset.  I'm afraid I don't have photos of lots of the process.  Given that I have no idea what I'm doing, and I'm making it up as I go along, it feels kind of irresponsible to put my full-on making-of info out there into the world, when it's likely it's very wrong. 
 
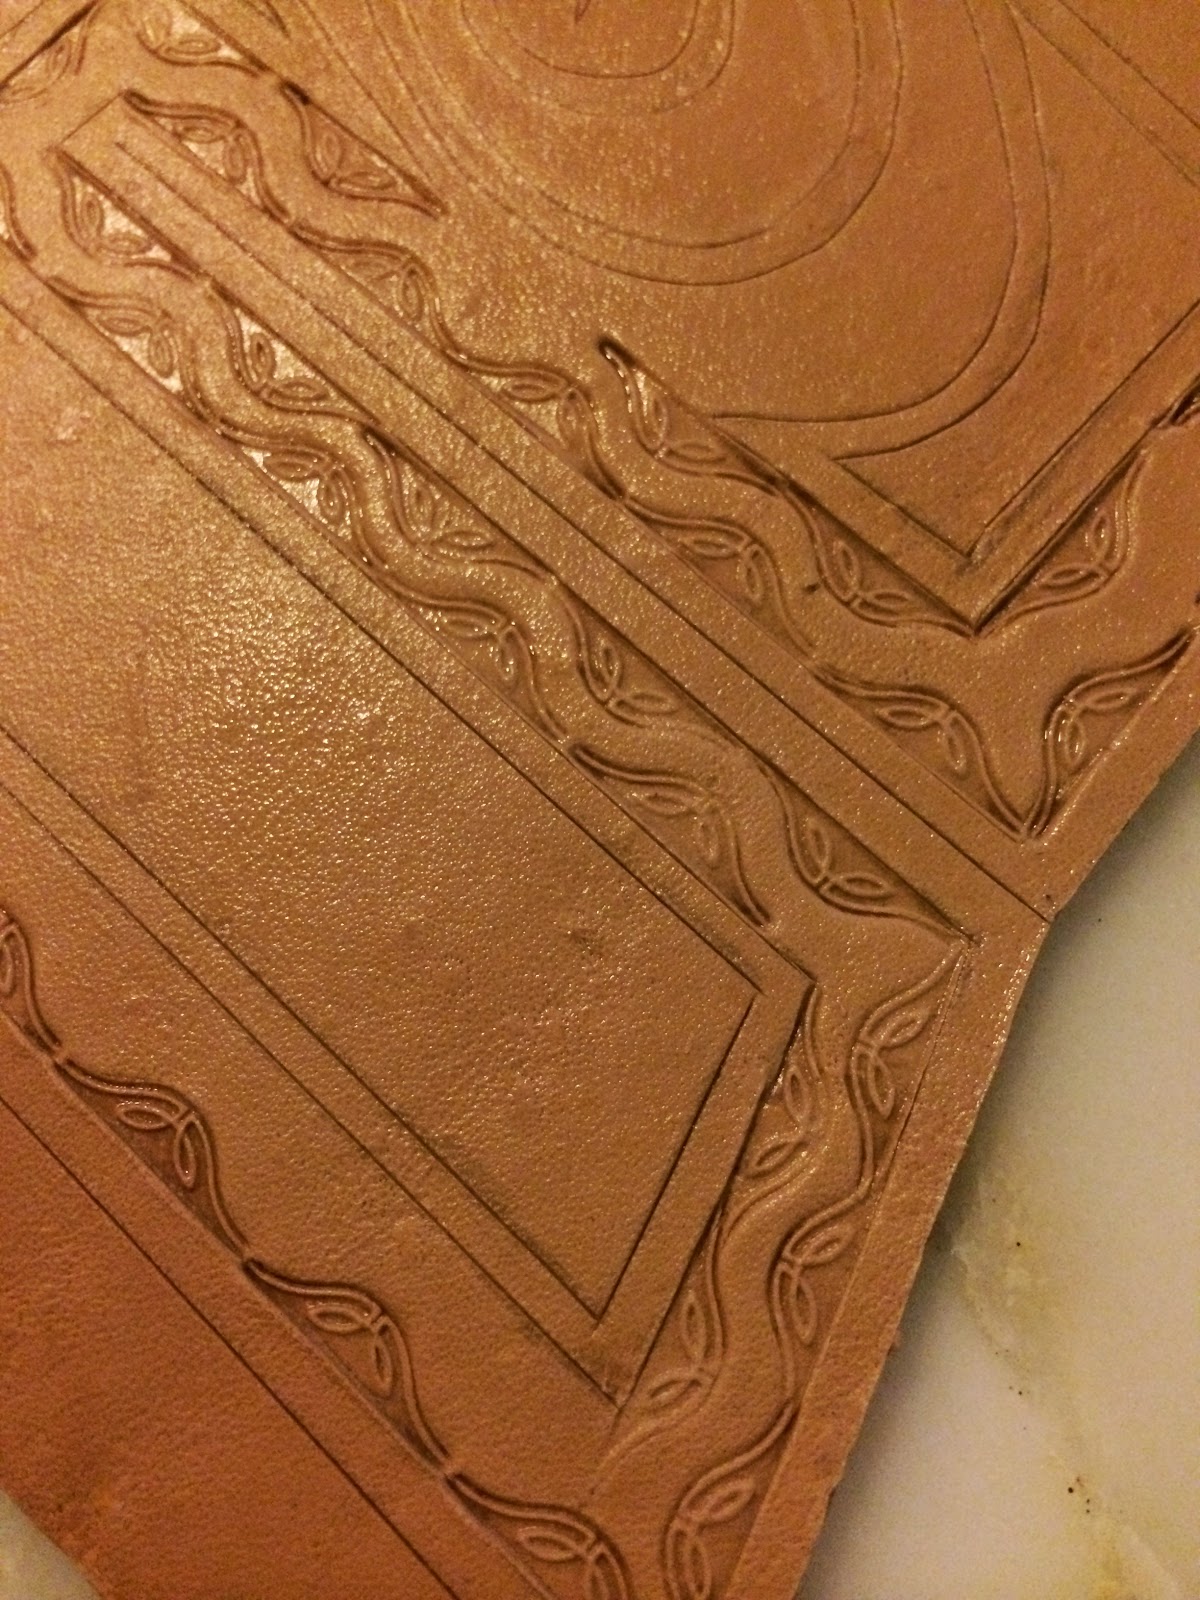
At any rate, I cut out the pieces, skived the edges, and did a bit of tooling on the toe cap, vamp, and counter.  Dyed the leather with the same Oxblood dye and Mahogany glaze as the corset.  There's one line of decorative-only stitching, so it'll match the corset.  The split on the counter, and the dart on the calf, are both hand-stitched with a dark brown heavy-duty thread.  I'm also going to glue the insides, for extra strength along those seams, and maybe glue a piece of (non-stretchable, fabric) tape over the seam as well.  I hand-stitched the toe cap to the vamp. 
 
 
I used the sewing machine to stitch the front, back, and outside seams on the boot leg - a standard seam, which then had to be wet and pounded out flat.  The vamp and counter are hand-stitched on, using the orange thread, so it's both a decorative and functional stitch.  Then, I carefully hand-stitched the inside seam.  After all - the fabric mock-up slipped on over my foot just fine, but I couldn't get in there with the sewing machine, and the leather is too stiff to sew the seam with the boot leg inside out and then turn it. 
 
Oops.  It took two days to sew that damn seam, and totally trashed my fingertips.  And then, I couldn't get my foot through it.  So I'm opening it back up, and installing a zipper.  On the up side, I didn't sew *both* boots before I discovered that little hiccup.  At this point, I just have to put the zippers in to both boots, and the outsides will be ready.  I still have to make the linings, but that should go a lot faster, since all the stitching can be done on the sewing machine, and the parts will be floppy, and easier to manhandle.
 
 
In other news, I've cut the celtek and shank board for the insoles, and formed the shank board, and glued them together.  I still have to put on the shanks, and do the fiberglass and epoxy bit.  Also, I discovered that my glue pot wasn't as well sealed as it could have been, and it's been months since I've used it, so the glue had dried up.  There wasn't much in there, but I'm not sure if the glue pot is slavageable, which is a shame, since they're not cheap.  I ordered more glue (Duall 88), and it's on it's way from New York, delayed slightly by the blizzard.  (It has to go ground....)  So I'm waiting on the glue to finish up the insoles.
 
While I'm waiting for my glue to arrive, I'll be making the linings and the heel blocks.  Hopefully, I'll be lasting by next week!  Which is good - because I have a chemise, scale maille skirt, cloak and purse to make, as well as my husband's jacket (an Elizabethan-inspired tuxedo-ish jacket, in dark blue velvet) to do.  Yikes!  I'd better get sewing.  On the up side, we'll be able to wear these to three events just this year (with different people at each event, for the most part), so killing myself now to get them done will pay off later.


Sunday, January 18, 2015

Rohirrim-inspired corset


It's finally done! Yippee!  (And now, updated - see bottom of post for more information...)
 
 
So - this bugger took FOREVER.  I wanted to do a corset based on the armor of the Rohirrim in Peter Jackson's Lord of the Rings films.  I've done several modern corsets - well, what I think of as "modern" - sort of princess seamed, no gussetts, 12 panels.  I wanted this one to be more evocative of the armor shape.  So I went with an Elizabethan style, sort of like the Effigy corset.  This corset shape is much more conical, with the tabs around the bottom, sort of like the tappets on the Rohirrim armor.  It's only 6 panels.
 
 
So - took my measurements and made a pattern.  Cut it out of brown twill (twice - once for the outside, once for the lining) and sewed it together.  The actual hero-armor (remade in lighter materials for filming) was plate hammered into shape, then covered with a tooled and dyed leather overlay.  I painted the twill with metallic latex house paint.  It actually looks pretty good.


Then, I designed the leather overlays.
 
And transferred those patterns onto tooling leather.  Unfortunately, this was my first time ever tooling leather, and I cut out everything - and got it soaking wet.  So the pieces stretched a lot.  They no longer matched the fabric they were to sit on top of.  It was really unfortunate.  So I did it all again.  This time, I didn't cut it out first - I did the tooling first.
 
 
THEN I cut out all the pieces.


Keeping with the Rohirrim style motifs, you'll see horse heads repeating.  (You might also notice just the slightest amount of stretching.  DAMN IT!!!)
 
Next, I dyed the leather (Fiebing's Oxblood) and buffed it with a mahogany leather stain so that the tooling would show nicely.


Next, time to put the channels for the boning into the lining.  I use bias tape.  I've had people ask why I purchase bias tape when I could make my own.  I figure, why should I make my own when they sell it for cheap at the fabric store, and I have better things to do with my time.  The boning on the front and back panels is 1/2" spring steel, the side panel uses doubled 1/4" spiral steel.
 
 
Then I stitched the leather onto the gold-painted corset.  I chose an orange heavy-duty nylon thread, because I really wanted those stitches to show.


Sewing the lining into the corset was a huge pain in the ass.  For starters, it all had to be hand-sewn, and I couldn't use any of my usual tricks, because of the leather.  So I thought I'd do a blanket stitch around a piece of waxed cord, with brown embroidery floss, to give it some substance.  This was a bad idea.  It looked terrible.  And it took longer to remove than it did to sew it in the first place.  And I'd done one entire side, top and bottom.  In the end, more bias tape was the way to go.  All told, just sewing the lining in took over a week of pretty much working on it all the time, much of that devoted to removing the waxed cord.


A couple of months ago, when I was starting this process (before going on vacation), one of the guys at work very kindly drilled holes in some spring steel boning for me, so I could put on the brass swing latches that I wanted to use instead of a standard busk.  I would NOT recommend this to anybody.  If you must use swing latches, find ones that can be riveted to lacing bones (as in, the center to center measurement of the latches is equal to the center to center measurement on the bones that come with holes already in them.)  Spring steel is extremely hard, and the guy who drilled them for me went through a drill bit for every two holes.  So, 14 drill bits.  And it wasn't pretty. 

Regardless, I was able to attach the latches, and to put the grommets in the back and on the shoulders. 


Here it is on me, in a test fitting.  The white ribbon is what I had laying around - I'll need to find something more appropriate.  Also, I'm terrible at tying the laces behind me, so that explains a little why it's not tightened very well, or tied nicely.


So excited that it's done!  Now, I need to very quickly make a pair of matching boots!  (And the dress that goes underneath it, and possibly a cloak, and maybe a little purse....)
 
 
EDITED TO ADD:
 
So - I made the dress that goes underneath this thing, and discovered a few problems. 
 
Problem #1 - the bottom edge of the back dug into my butt in an unattractive way, and made the skirt underneath poke out weirdly.  Solution:  I removed the 1/2" spring steel boning and replaced it with 1/4" spiral steel boning (because that's what I had available).  Now, the bottom of the back bends outward a little more, and doesn't poke me. 
 
Problem #2 - those cool swing latches.  As long as I didn't move, they were great.  As soon as my left shoulder went up, they all popped right out of their holes, and the whole corset popped open.  This is... less than ideal.  The problem is that any sort of vertical shift caused the whole thing to fail.  I didn't want to sew the front of the corset closed - it's too hard to get into if you have to completely re-lace it to get into it.  I made a front "modesty panel" from the same fabric as the chemise, and put large rectangles of industrial-strength velcro on both the panel, and the inside of the front of the corset.  Now, to put it on, I velcro it into place, then shut the latches.  Works like a charm, and doesn't allow for any vertical slippage.  Totally invisible from the outside.  Yippee!  The only problem here is that if I want to wear something that's not cream colored underneath, I'll have to cover up the velcro/modesty panel, but I figure a piece of ribbon or something will do just fine for that.